Osiris 1.2 brings security to your indoor maps
Feb 6, 2017 • Guillermo Amat

Osiris 1.2 has been released bringing security to the whole set of web services. In previous versions, anyone could access to any map uploaded to the server as the services didn’t check grants. Even more, the concept of user didn’t exist. The new feature requires a new collection to be created for each map in the database. This collection stores users’ credentials making possible to add so many users as you want.
As you will see later, the process to set up all is a little more complicate than before but, we are working on developing a tool to make it easy to add new users and automate the creation of the credentials collection.
In the client side, now it is necessary to include an additional header on every method as is explained later. This means you have to modify your client applications if you already have one using older versions of Osiris.
Building Osiris
The main steps are still the same. There is a build.sh script which creates all the libraries and the fatjars needed. After executing it, you will find a collection of jar files and scripts within the bin directory. You can use this folder as a sandbox for trying Osiris, if you want to customize your installation take a look at the configuration files EnvConf.yml and env.properties
First, get the code of the project cloning the repository or downloading the zip file. Using the first method:
git clone https://github.com/osiris-indoor/osiris.gitTo build the project in linux, execute:
cd osiris
./build.sh
The script builds all the components and runs the unit tests for each of them.
Setting up Osiris
There are two things to do in order to set an Osiris environment. Firstly we need to import a map, secondly we will configure the security. For both processes a MongoDB instance should be running.
Import a map:
The importer reads OpenStreeMap maps in .osm format. You can find some sample maps here
To import a map called map.osm having MyMapId as identifier you can use
cd bin
sudo ./import_map.sh MyMapId /path_to_my_map/map.osm
The first time you use the previous command the identifier will be created for the new map. Use again the same command to update the map (the map will be rewritten with the same identifier).
Security setup
Now, we need to set up the security. Note that we are working to make this procedure easier (in the following days we will provide a tool to create users)
First we need to generate the string to use in the mongo collection as an encrypted password
java -jar osiris-encrypt-password.jar your_passwordThis will output: zZpRQvC79xErr9l0yz8Wwg==
Now, you have to create a collection in Mogo for the credentials. Note that we will use MyMapId as the identifier of the map / application:
mongo
use osirisGeolocation
db.createCollection("credentials_app_MyMapId", {} );
db.credentials_app_MyMapId.insert({"_id" : "your_username", "password" : "zZpRQvC79xErr9l0yz8Wwg=="})
db.commit
You can add as many users as you want using the db.credentials_app_MyMapId.insert command
Running Osiris
Just execute the following command:
./osiris.shIf everything goes well, you will see some debug information and finally something like this:
GET /osiris/geolocation/territory/map/metadata (com.bitmonlab.osiris.api.map.rest.impl.MetaDataResourceImpl)
GET /osiris/geolocation/territory/map/file (com.bitmonlab.osiris.api.map.rest.impl.MapFileResourceImpl)
DELETE /osiris/geolocation/territory/feature/{idFeature} (com.bitmonlab.osiris.api.map.rest.impl.FeatureResourceImpl)
GET /osiris/geolocation/territory/feature/{idFeature} (com.bitmonlab.osiris.api.map.rest.impl.FeatureResourceImpl)
POST /osiris/geolocation/territory/feature (com.bitmonlab.osiris.api.map.rest.impl.FeatureResourceImpl)
PUT /osiris/geolocation/territory/feature/{idFeature} (com.bitmonlab.osiris.api.map.rest.impl.FeatureResourceImpl)
POST /osiris/geolocation/territory/search (com.bitmonlab.osiris.api.map.rest.impl.SearchResourceImpl)
How to call the services
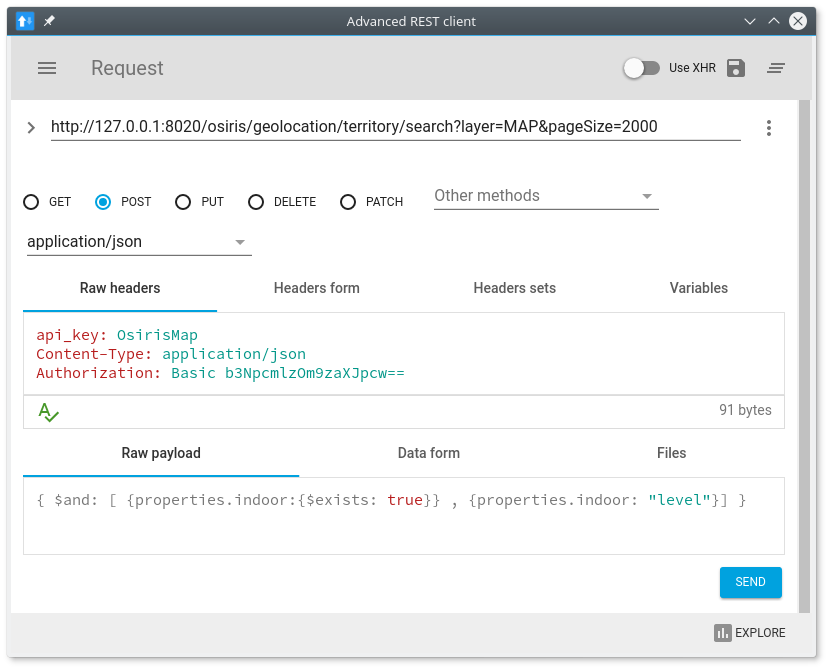
To call the services it is necessary to include the credentials as follows:
The user name and password should be encoded in Base64 (ISO-8895-1) using the format user:password In our example your_username:your_password is eW91cl91c2VybmFtZTp5b3VyX3Bhc3N3b3Jk and this credential has to be added to the Authorization header:
Authorization: Basic eW91cl91c2VybmFtZTp5b3VyX3Bhc3N3b3Jk
As an example using curl, you can call the search service this way:
curl -i -H "api_key: MyMapId" -H "Content-Type: application/json" -H "Authorization: Basic eW91cl91c2VybmFtZTp5b3VyX3Bhc3N3b3Jk" -X POST -d '{ $and: [ {properties.indoor:{$exists: true}} , {properties.indoor: "level"}] }' http://127.0.0.1:8020/osiris/geolocation/territory/search?layer=MAP&pageSize=2000If you imported a map (as explained in 1 ), you will see a JSON with information of your buildings.


